Showing posts with label Recipe Wednesday. Show all posts

Wednesday, January 4, 2012

Recipe Wednesday: The Perfect Jumpstart to Your Day

Ah the life of a working girl. There is no rest for the wicked, really. After having over one week off to lounge around in my cute pj pants and watch Hoda and Kathee Lee every morning (I'm not joking. I want to join their show) it's back to reality. For the past two days I've had to get up before 7am and be a functioning adult by around 8:30ish...or at least by noon. Rough stuff, I know.

What is the point of all of this rambling, you ask? Well, I can't function without coffee (duh) and a tasty breakfast. Sadly I'm one of those people that eats her breakfast at her desk and it's usually greek yogurt with fruit. Boring, yes. But usually pretty tasty. Sometimes, though, I get crazy and break from this routine. This week I've been eating the best breakfast ever. It's simple and just the perfect amount of sweet and heat to get you going.

How does one make this perfect breakfast, you ask? Don't worry, I'll tell you. First, get a tasty bagel. I'd suggest a Gotham Bagel if you happen to be in Madison. Toast that badboy until it's golden brown. 
Source
Now that you've got a piping hot bagel slather some cream cheese onto it. Simple? Yes. But this isn't the end of it. Who on earth would call a bagel with cream cheese The Perfect Jumpstart to Your Day? Not this girl. Lame.

This bagel will no longer be ho hum once you put on Clem's Hot Pepper Relish. The relish is a combination of red peppers and sweet onions which results in a magical blend of sweet and heat goodness. You could eat this stuff by the spoonful. What makes this extra special is the fact that it's made just outside of Madison in Baraboo, WI by Hawkwind. From their site:  Hawkwind is 75 acres of enchanted woods and farmland located in the Baraboo Bluffs.  It is a marriage of our passions:  farming, crafting our products, an Adventure Challenge Course, and Healing Center.

And that, my friends, is a great way to start any morning.
 
Source


Wednesday, November 9, 2011

Recipe Wednesday: Hot Cocoa!

It's officially that time of year. The time of year when I have hot cocoa almost every night. It's true. There is no better way to end the day.

This recipe will be simple but it will be the tastiest hot cocoa you'll every have. I guarantee ;)
Source
Greatest Hot Cocoa

Fill your mug with milk. No water! The only way to make hot cocoa is with milk. I use 1% but whole would be tastier. I'm trying to watch my girlish figure.

Heat milk to desired temperature. Don't boil it!

Add chocolate. Some people like to use dark cocoa powder or real chocolate. I'm weird. My favorite will always be Swiss Miss since I don't like things to be too chocolatey. I didn't say this was the classiest hot cocoa. But wait, we'll make it appear that way.

Once you've mixed the chocolate and milk add a dallop of whip cream and then sprinkle with cinnamon.

Voila! The greatest hot cocoa ever. Now go snuggle up on the couch with a good book.


Wednesday, November 2, 2011

Recipe Wednesday: Bongo Cakes AKA The World's Most Amazing Pancakes Ever

Do I need to say anything else about these other than they are the greatest ever? They're inspired by the pancakes at the Bongo Room in Chicago and this other lovely blogger was great enough to figure out how to recreate them.

I was just talking to a good friend about these after she was talking about making the world's greatest pumpkin pancakes. Or something like that. It doesn't matter. These are the only thing you ever need to eat. I've already got my weekend planned out and it will be based entirely around these pancakes! Want to hear what my plans are? Ok, I'll tell you!

Saturday - wake up and go to the last outdoor Dane County Farmer's Market of the season. Wait, first I'll get coffee here. Then buy tasty veggies since I'm back to making healthy food. Then after I buy healthy veggies I'll come home and make this super unhealthy (but oh-so-tasty!) mountain of pancakes. Then I'll nap until I have to go to work on Monday ;)
Source


White Chocolate Caramel Pretzel Pancakes inspired by The Bongo Room (Chicago)
Serves 2
Pancake recipe from here.

Ingredients
3/4 cup milk
2 tablespoons white vinegar
1 cup all-purpose flour
2 tablespoons white sugar
1 teaspoon baking powder
1/2 teaspoon baking soda
1/2 teaspoon kosher salt
1/2 cup of crushed pretzels
1 egg
1 teaspoon pure vanilla extract
2 tablespoons butter, melted

Mix together the milk and the vinegar in a small bowl and set aside for 5-10 minutes, so that the milk sours.  Meanwhile, combine all the dry ingredients into a bowl.  After the milk has soured, pour it into the dry ingredients and also add the egg and the vanilla extract.  Whisk together all the ingredients until they form a smooth batter.  Mix in the crushed pretzels.  Heat a frying pan or griddle on medium-low heat with some butter or oil.  Take 1/4 cup fulls of the batter and cook on a frying pan or griddle until cooked on both sides, flip when the top of the pancake is covered in bubbles, about 2 minutes per side.

Serve with warm caramel sauce and white chocolate sauce and garnish with crushed pretzel pieces and confectioner’s sugar.

Maybe you want to run 74 miles after enjoying these to get rid of some of the guilt? Nahhhhhh.


Wednesday, April 6, 2011

Recipe Wednesday: Create Your Own!

On Saturday I'm having a few friends over to cook up a tasty Thai dinner. I can't wait! One of them sent me a link to this great tool on the Fine Cooking web site to figure out what tasty dish(es) we should make. Let's just say I've been having a little too much fun with it and coming up with some crazy combos!

This link is for creating your own Thai recipes (hello, anything with peanut sauce is tasty!) but they also have options to create your own cheesecake (yes, please!), meatloaf, fruit crisp, risotto and more. I would highly suggest you check it out!

Source

Wednesday, March 16, 2011

Recipe Wednesday: Oatmeal Stout Cake with Apples & Whiskey Cream

In honor of St. Patty's Day tomorrow! I found this via the Big Girls Small Kitchen blog, which is one of my new faves.

Source


Oatmeal Stout Cake with Apples & Whiskey Cream
Makes 1 loaf
The whiskey is optional, as is the cream. The cake is wonderful with and without ‘em.

Ingredients
1 cup oats
11/2 cups oatmeal stout or other dark stout beer
1½ cups flour
1 teaspoon baking soda
½ teaspoon salt
½ teaspoon cinnamon
¼ teaspoon nutmeg
¾ cup neutral oil
1 cup brown sugar
3/4 cup sugar
2 eggs
½ teaspoon vanilla extract
2 apples, peeled, cored, and cut into ¼-inch dice
1 cup heavy (whipping) cream
1-2 tablespoons whisky
2 tablespoons powdered sugar, plus more for dusting

Wednesday, March 9, 2011

Recipe Wednesday: Cider-Glazed Mini Apple Muffins

This past weekend I had an impromptu relaxing Sunday and spent absolutely zero (yes, zero!) hours in the lab working on my design project. So what if it was because I left my keys in my office? Oops! Anyway, it was wonderful to just lounge around at home. And how did I start this great day? By making these cute little muffins

I must admit that I read the recipe way too quickly and thought it said apple cider vinegar (which I have in my cupboard) instead of apple cider (which I don't have). Again, oops. So instead I shredded the other half of the apple and it worked like a charm.  Instead of walnuts I used almonds because that's what I had. Although I didn't do the glaze since I was missing the all-important apple cider, I think they were still very, very tasty!

Cider-Glazed Mini Apple Muffins

For muffins
  • 1/4 cup walnuts
  • 1/2 Granny Smith or Golden Delicious apple
  • 1 cup all-purpose flour
  • 1 1/2 teaspoons baking powder
  • 1/2 teaspoon cinnamon
  • 1/4 teaspoon salt
  • 3 tablespoons unsalted butter
  • 1/4 cup packed brown sugar
  • 2 tablespoons unpasteurized apple cider
  • 1 large egg

For cider glaze
  • 2 cups unpasteurized apple cider
  • 2 tablespoons granulated sugar
Make muffins:
Preheat oven to 400°F. and grease twelve 1/8-cup mini-muffin cups (about 1 3/4 inches across top and 3/4 inch deep).
Lightly toast walnuts and chop fine. Core and peel apple and cut into 1/4-inch dice. Into a bowl sift together flour, baking powder, cinnamon, and salt. In a saucepan melt butter and stir in brown sugar. Remove pan from heat. Whisk cider and egg into butter mixture until smooth and add to flour mixture, stirring until combined well. Stir in walnuts and apple. Divide batter among muffin cups and bake 15 minutes, or until golden.
 
Make glaze while muffins are baking:
In a 2-quart saucepan boil cider 15 minutes, or until reduced to about 1/2 cup, and pour through a sieve lined with 4 layers of cheesecloth to remove sediment. Return cider to cleaned pan and add sugar. Simmer mixture, stirring, until syrupy, about 5 minutes. While muffins are still warm, with a wooden pick make several holes in top of each muffin. Brush warm glaze over muffins several times until absorbed.

Wednesday, February 16, 2011

Recipe Wednesday: Milk Bar's Crack Pie

So I'm watching an old episode of No Reservations where Anthony Bourdain focuses on food porn. I'm hungry. Really hungry. He spends a bit of time with David Chang, the master behind momofuku noodle bar and related restaurants. This makes me want to go find some pho around Madison. Does it exist? Hmmm, I'm thinking it's probably hard to find.

It's much easier to focus on baked goods. Like this Crack Pie from momofuku's Milk Bar. I'm definitely making this soon. Very soon.


Crack Pie

Ingredients
Oat Cookie Crust
  • Nonstick vegetable oil spray
  • 9 tablespoons (1 stick plus 1 tablespoon) unsalted butter, room temperature, divided
  • 5 1/2 tablespoons (packed) golden brown sugar, divided
  • 2 tablespoons sugar
  • 1 large egg
  • 3/4 cup plus 2 tablespoons old-fashioned oats
  • 1/2 cup all purpose flour
  • 1/8 teaspoon baking powder
  • 1/8 teaspoon baking soda
  • 1/4 teaspoon (generous) salt
Filling
  • 3/4 cup sugar
  • 1/2 cup (packed) golden brown sugar
  • 1 tablespoon nonfat dry milk powder
  • 1/4 teaspoon salt
  • 1/2 cup (1 stick) unsalted butter, melted, cooled slightly
  • 6 1/2 tablespoons heavy whipping cream
  • 4 large egg yolks
  • 1 teaspoon vanilla extract
  • Powdered sugar (for dusting)
Preparation
Oat Cookie Crust
  • Preheat oven to 350°F. Line 13x9x2-inch metal baking pan with parchment paper; coat with nonstick spray. Combine 6 tablespoons butter, 4 tablespoons brown sugar, and 2 tablespoons sugar in medium bowl. Using electric mixer, beat mixture until light and fluffy, occasionally scraping down sides of bowl, about 2 minutes. Add egg; beat until pale and fluffy. Add oats, flour, baking powder, baking soda, and salt and beat until well blended, about 1 minute. Turn oat mixture out onto prepared baking pan; press out evenly to edges of pan. Bake until light golden on top, 17 to 18 minutes. Transfer baking pan to rack and cool cookie completely.
  • Using hands, crumble oat cookie into large bowl; add 3 tablespoons butter and 1 1/2 tablespoons brown sugar. Rub in with fingertips until mixture is moist enough to stick together. Transfer cookie crust mixture to 9-inch-diameter glass pie dish. Using fingers, press mixture evenly onto bottom and up sides of pie dish. Place pie dish with crust on rimmed baking sheet.
Filling
  • Position rack in center of oven and preheat to 350°F. Whisk both sugars, milk powder, and salt in medium bowl to blend. Add melted butter and whisk until blended. Add cream, then egg yolks and vanilla and whisk until well blended. Pour filling into crust. Bake pie 30 minutes (filling may begin to bubble). Reduce oven temperature to 325°F. Continue to bake pie until filling is brown in spots and set around edges but center still moves slightly when pie dish is gently shaken, about 20 minutes longer. Cool pie 2 hours in pie dish on rack. Chill uncovered overnight. DO AHEAD Can be made 2 days ahead. Cover; keep chilled.
  • Sift powdered sugar lightly over top of pie. Cut pie into wedges and serve cold.

Wednesday, February 9, 2011

Recipe Wednesday: Pumpkin Waffles

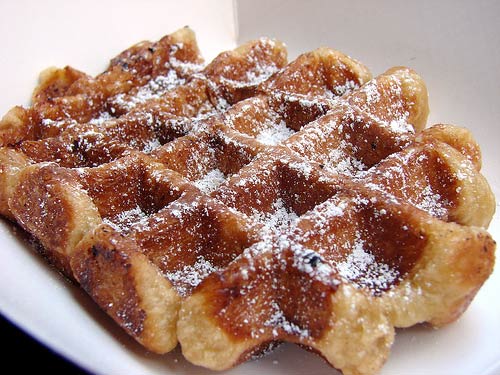
I made these waffles the other weekend when I was in super-motivated cooking and baking mode. I made a double batch and stuck them in the freezer to enjoy at work. They are delish!

My waffle maker is the coolest waffle maker on earth. It makes waffle sticks! So, instead of dousing waffles with syrup (and then having them get really soggy) I dunk 'em. It makes my mornings just a wee bit more interesting. Hey, every little bit counts!
Source
Did you know that have a National Waffle Day? How great!

Pumpkin Waffles 
  • 1 cup plus 2 tablespoons all-purpose flour
  • 2 tablespoons brown sugar
  • 1 teaspoon ground cinnamon
  • 1/2 teaspoon salt
  • 1/2 teaspoon baking powder
  • 1/4 teaspoon baking soda
  • 2 eggs
  • 1 cup milk
  • 1/2 cup canned pumpkin
  • 2 tablespoons butter, melted

     
  • Orange Walnut Butter (I didn't make this but I bet it could be tasty!):
  • 1/2 cup butter, softened
  • 1/4 cup chopped walnuts
  • 1 tablespoon grated orange peel
  • Maple syrup

Directions

  • In a large bowl, combine the first six ingredients. In another bowl, combine the eggs, milk, pumpkin and butter; stir into dry ingredients just until combined.
  • Bake in a preheated waffle iron according to manufacturer’s directions until golden brown.
  • Meanwhile, for orange walnut butter, in a small bowl, combine the butter, walnuts and orange peel until blended. Serve waffles with butter mixture and maple syrup. Yield: 4 servings.
Recipe from Taste of Home.

Wednesday, February 2, 2011

Recipe Wednesday: Trinidadian Chicken Curry

Have you been to visit The Pioneer Woman? If you haven't, I suggest you go visit her blog immediately. She is hilarious and has a way of writing that makes me want to go hang out with her for a weekend at her ranch. Actually, her writing really reminds me of the way I carry on a conversation...so many details, minor tangents about something that is somehow, in someway, related to the topic. Oh, we would have so much fun. Plus, I've always wanted to live on a huge ranch. With a huge ranch house that has an amazing kitchen. If only I had the life of Ree Drummond.

Anyway (did I mention I go on tangents?), I was in search of a curry recipe and came across this recipe from The Pioneer Woman. I've got my chicken marinating right now and in about an hour I'll be ready to dig in. Since I live alone I'm pretty certain it's ok for me to eat it with my fingers, the way it was intended to be enjoyed!
Source

Tom's Trinidadian Chicken Curry

Ingredients

  • 4 pounds Chicken Pieces (I Used Legs And Thighs), Rinsed, Skin And Fat Removed
  • 2 teaspoons Salt
  • Cracked Black Pepper
  • 1 teaspoon Yellow Mustard
  • 1 whole Medium Onion, Halved
  • 1 whole Tomato, Quartered
  • 8 cloves Garlic
  • 8 sprigs Cilantro
  • 2 Tablespoons (rounded) Curry Powder (I Used A Trini Mix)
  • 2 teaspoons Turmeric
  • 4 Tablespoons Vegetable Oil
  • Jalapeno Pepper, Sliced (optional)
  • Potatoes (optional)

Preparation Instructions

Place chicken in a bowl. Sprinkle with salt and add mustard.
In a food processor, chop half the onion, tomato, cilantro, garlic, and black pepper (or jalapeno/habanero).
Add mixture to the bowl. Stir the whole mixture together so that the chicken is totally coated in the seasoning ingredients. Allow chicken to marinate for at least two hours.
After chicken has marinated, make the curry slurry: Add curry powder and turmeric to a bowl. Pour in 3/4 cup water and stir until dissolved.
In a large skillet, heat the vegetable oil over medium-low heat. Pour in the curry slurry and cook for a few minutes, stirring constantly. Curry slurry will deepen in color. If the mixture becomes too dry during cooking, add a little water.
When the curry slurry has become a thick paste, chop the other half of the onion and add it in. Allow the onions to soften, then add in the chicken. Stir to coat the chicken, then cook, half covered, for five minutes. Turn the chicken, then add in 1 to 2 cups of water. Shake the pan and allow the chicken to cook until done, stirring every five minutes. Cook for about 20 to 15 minutes.
At the end, be sure to taste and adjust salt and pepper. Serve chicken over rice; spoon sauce over the top.

Wednesday, January 19, 2011

Recipe Wednesday: Black-Bottom Coconut Bars

When it gets really cold around here I need to be reminded that someday it will be warmer. Sometimes that someday seems so far away! April, where are you?

I think the coconut in this recipe can get me thinking of tropical weather. Far fetched? Yes. But sometimes a girl's gotta do whatever it takes to make it through the winter. This also includes tropical drinks at Jolly Bobs. Oh yes.

Chocolate Base

  • 1/2 cup unsalted butter, plus more more pan
  • 1/2 cup granulated sugar
  • 1/4 teaspoon salt
  • 1 large egg
  • 1/4 cup unsweetened cocoa powder
  • 1/4 cup all-purpose flour
Preheat oven to 375°. Line a 9-inch square baking pan with aluminum foil, leaving an overhang. Butter bottom and sides of foil.
Using a microwave-safe bowl, melt butter in microwave. Whisk in sugar and salt. Whisk in egg, then sugar and flour. Mix until smooth. Spread evenly in prepared pan.
Bake for 10-15 minutes. The sides should be beginning to pull away from the sides of the pan. Set aside to cool.

Coconut Topping

  • 2 large eggs
  • 3/4 cup granulated sugar
  • 1/2 teaspoon vanilla extract
  • 1 cup all-purpose flour
  • 7 ounces sweetened, shredded coconut – reserve 1/2 cup for sprinkling on top
Whisk eggs with sugar and vanilla. Mix in flour and coconut.
Drop mounds of topping onto chocolate base. Spread and press into base with moistened fingers. Sprinkle with 1/2 cup coconut.
Bake 25-30 minutes, or until a toothpick inserted in the center comes out with moist crumbs attached. Cool completely in pan. Then, remove from pan using aluminum foil overhang. Peel off foil and cut into bars. Store in an airtight container for 3-4 days.
Makes 24 bars.

Wednesday, January 12, 2011

Recipe Wednesday: Homemade Nutella

I bet you can't guess the next new recipe I'll be trying out??
Source
I've only recently started being more adventurous in the kitchen. I've always cooked and made some tasty meals, but usually they were really simple and the same few over and over again. Can a girl really eat a homemade veggie pizza or quesadilla every day? Well, yes. But what fun is that?

Oftentimes I would find a recipe I wanted to make but would decide to not do it because I didn't have the ingredient on hand and why would I want to buy an ingredient that I may end up wasting. I was also afraid it wouldn't turn out right. Oh, the stress!

Well I decided that if it doesn't turn out right, so what? I'll eat almost anything. And I give food to my friends. Or I freeze it. Or, more often than should happen, I eat it all in one sitting. Oops!

This homemade nutella, found on the beautiful Bon Vivant blog, is probably the next thing I'll make and eat within 15 minutes.  Maybe I'll share it...but probably not. And the pictures are so appropriate because my favorite way to eat Nutella is on a baguette. And then on a banana. And then straight off of the spoon. And then digging my finger into the almost empty jar to get every last niblet. Oh, I'm getting hungry.
Source
Grown-up Chocolate Hazelnut Spread (Nutella) (adapted from David Lebovitz and Su Good Sweets)
Makes about 14 ounces
10 oz/ 300 grams hazelnuts, toasted and skins removed
2 oz/ 60 grams cocoa nibs
1/2 to 2/3 cup/ 60-70 grams powdered sugar
7 teaspoons unrefined hazelnut oil
1/2 teaspoon espresso powder
To toast the hazelnuts, preheat your oven to 300F and spread the nuts on one layer on a large baking sheet. Toast the nuts for about 15 minutes until golden brown, then rub their skins off with a clean cloth. Set aside.
Toast the cocoa nibs by placing them in a saucepan over medium heat, stirring occasionally until they darken and are slightly shiny. Remove from heat and set aside.
Place the nuts and cocoa nibs in a food processor and chop them until they liquefy. Your processor will sound as if it’s throwing a hissy fit and about to implode, but keep your finger on the pulse button until you get a thick, lovely dark chocolate hazelnut butter. The nuts and nibs will first gather into a ball before turning into butter. To help move things along, you may need to scrape down the sides of the processor bowl to ensure that everything is pulverized.
Add the sugar, oil and espresso powder and pulse again, scraping down as needed until everything is well incorporated into a lusciously thick sauce. There will still be chunks of nibs remaining which will give a slight crunch to each spoonful.
Store the spread in clean and dry airtight containers/jars and refrigerate. Bring the spread to room temperature before using.
Related Posts with Thumbnails